DIY Leather Restraints for BDSM
Make two soft leather wrist cuffs for consensual adult roleplay. Fit each one with a paper pattern, then sew a peel-open closure you can release by hand.
Materials and tools
Choose supple leather that wraps around your wrist without springing straight. A soft 3–4 oz leather, roughly 1.2–1.6 mm thick, is a starting point. Bend a scrap into a curve and check the cut edge and back against your skin. If it feels scratchy or rigid, choose a different piece before cutting the pair.
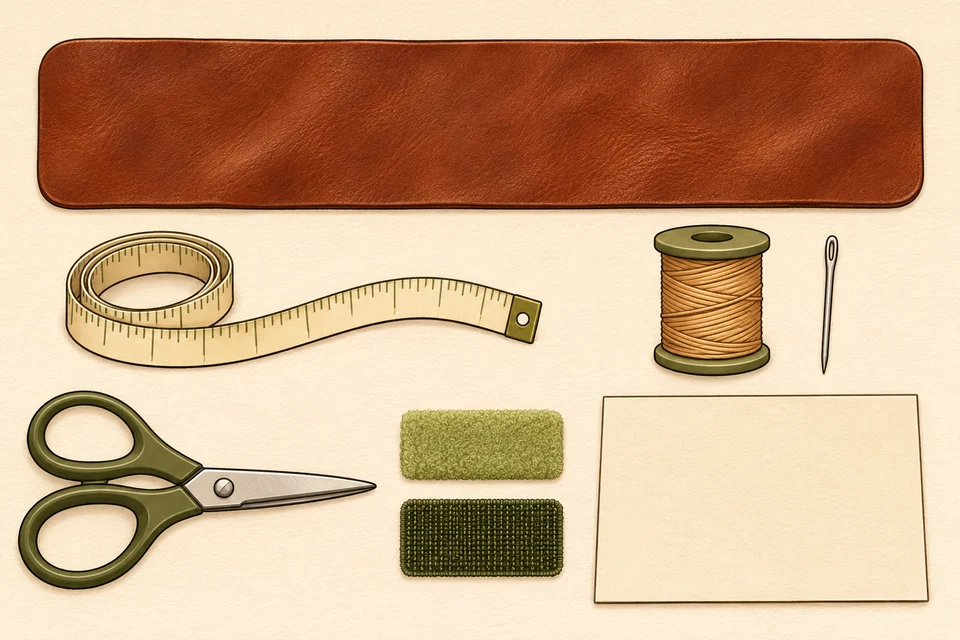
- Cuff bodies: Two leather strips cut from your fitted paper patterns. Start with a pattern about 1¼ in (32 mm) wide and narrow it if it crosses your wrist crease.
- Fasteners: Two sets of soft, sew-on hook-and-loop tape. Each cuff uses a soft loop patch and a short hook patch. Test a scrap pair to find a closure you can peel open easily.
- Sewing tools: A leather awl, hand-sewing needles and polyester thread. Use clips to hold the tape in place without leaving extra holes in the leather.
- Pattern and cutting tools: A flexible tape measure, cardstock, pencil, ruler, craft knife, cutting mat and a scrap block to protect the work surface when piercing stitch holes.
- Optional lining: A thin, smooth fabric or soft leather that stays flat when bent. If you line the cuffs, make your test strip with the lining in place so the added thickness is reflected in the fit.
Measure and make a paper pattern
Measure each wrist at the place the cuff will sit, with the hand relaxed. Keep the measuring tape against the skin without pulling it tight. Mark the right and left patterns separately. Wrap a strip of cardstock around the first wrist and adjust it until it rests loosely and you can bend your wrist without a corner catching.
Mark where the paper meets itself at that loose fit. Add an overlap long enough for the tape and a finger-grip tab. Mark the end that sits next to your wrist as the underlap and the end that crosses over it as the flap.
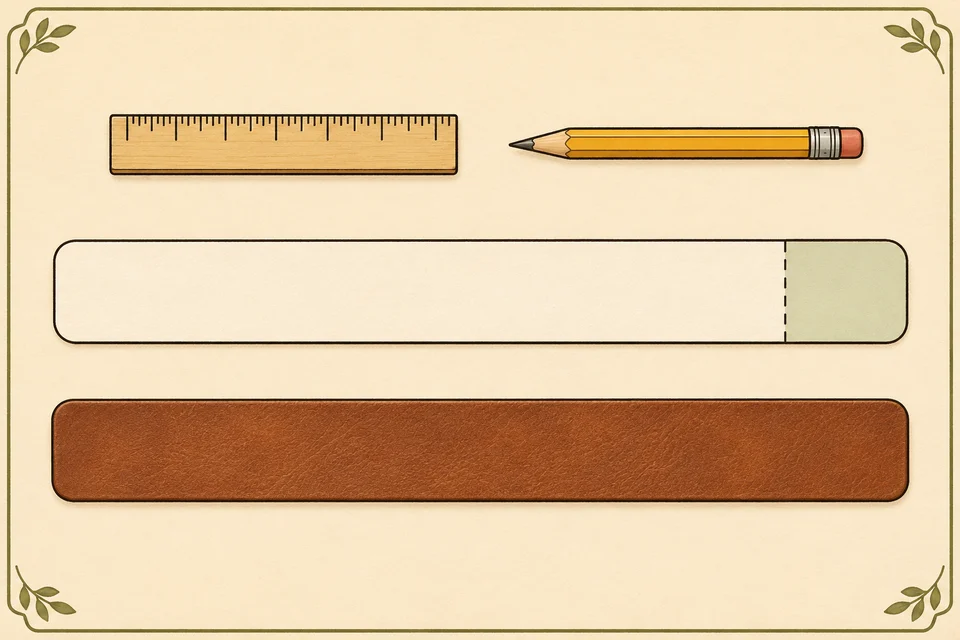
- Example wrist measurement
- 6½ in (165 mm)
- Loose circumference on the paper mock-up
- 7 in (178 mm)
- Example overlap, including the peel tab
- 1½ in (38 mm)
- Example starting blank
- 8½ × 1¼ in (216 × 32 mm)
The example shows how to calculate the blank from a mock-up. Adjust the circumference and overlap for the actual wrist, leather thickness and tape you chose. Make a fresh pattern if you change the width or add a lining.
Cut, finish and sew the cuffs
Trace and cut one cuff first
Transfer the paper outline to the back of the leather. Put the ruler over the piece you want to keep and make several shallow passes with a sharp blade. Round the corners with a small curved template. On the wrist side, feel for any rough spots along the edges and around the flap.
Smooth the edges
For firm vegetable-tanned leather, test light sanding and burnishing on an offcut. For softer leather, a clean cut and rounded corners may be enough. If you use an edge product, follow its cure time and rub a light cloth across the edge to check for transfer. Tandy Leather shows the basics in its leathercraft tutorials.
Mark the fastener faces
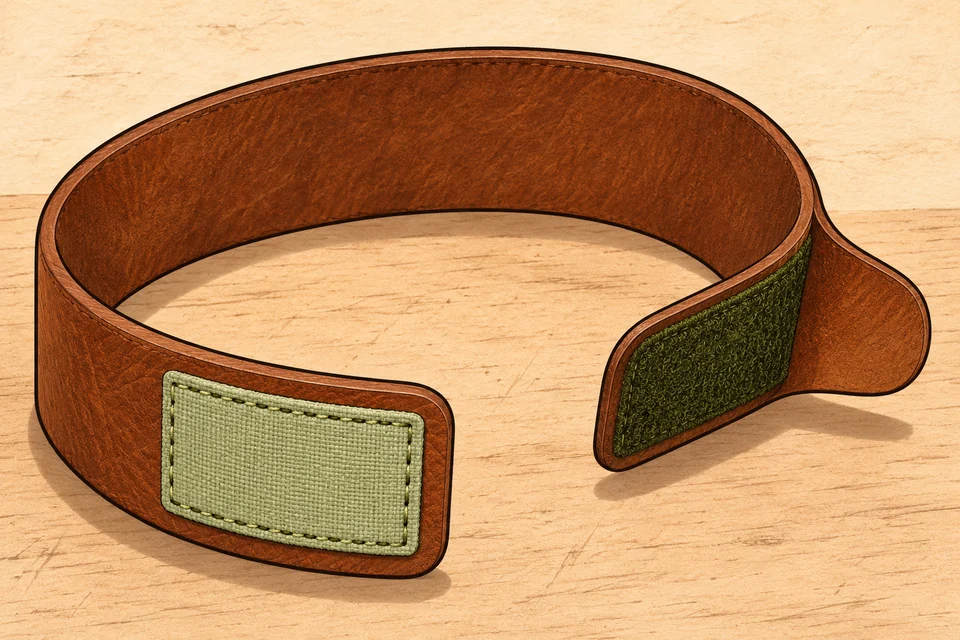
Curve the blank around a rolled towel at the mock-up circumference. Clip the soft loop patch to the outside of the underlap and the hook patch to the inside of the flap so the two patches meet when closed. Leave the flap tip bare for a peel tab you can pinch. Confirm that the hooks stay fully covered throughout the usable fit range.
Hand-sew each patch
With the tape clipped in place, mark a stitch line inside its edge. Use the awl and scrap block to make clean holes through the leather along that line. Sew around the patch, keeping the thread snug enough to lie flat. Secure the thread where its ends will sit smoothly, then check both faces for lumps or rough spots. For tape handling, see the manufacturer’s sew-on fastener guide.
Check the release and make the second cuff
Close the cuff around the towel and peel it open from the tab several times. The tab should be easy to find and grip. Watch for lifting tape corners, stitching that cuts into the leather, or a flap that folds out of reach. Correct those issues before copying the construction for the other wrist.
Check fit and release before use
Fit and release are separate checks. A cuff can feel loose and still have a tab that is hard to reach. Start with the wrists in front and both hands free. Have the wearer open each cuff using their other hand, then have their partner practice opening both. Repeat at each usable closure position. Keep the tabs reachable and leave the cuffs independent of each other and free from anchors.
- Fit: The band should sit loosely, with room to move the wrist and fingers freely. Check for a pinching edge when the wrist bends. If the cuff needs to be cinched down to stay closed, revisit the pattern and patch placement.
- Release: The tab should lift in one peel. If you have to dig for it with a fingernail, extend the bare tip or reposition the tape. If the fastener takes substantial effort to peel, replace it with a lighter sew-on tape and retest.
- Consent: Agree on the activity and a verbal or nonverbal stop signal ahead of time. Check in, stay present and remove the cuffs immediately when asked or when you are unsure whether consent continues. See the National Coalition for Sexual Freedom’s consent guidance.
- Stop signs: Remove the cuffs immediately for tingling, numbness, pain, swelling, or a change in hand color or temperature. Seek medical care promptly if symptoms persist or there is weakness or loss of feeling. Read about nerve compression and its symptoms.
Keep this design for light, supervised roleplay. Leave locks and load-bearing hardware out of the build. Keep the cuffs away from the neck and off furniture, and never use them for suspension.
Troubleshooting and care
Why does the leather dig in when I bend my wrist?
The band may cross the crease, or a square corner may catch as your hand moves. Mark where it rubs on the paper pattern, then try a narrower band and rounder ends. If it still presses into the wrist, choose softer leather and remake the cuff.
Why does the fastener scratch?
Check for a hook patch that overhangs the loop patch at the loose end of the fit range. Reposition or trim the hook tape before sewing a replacement patch. Keep exposed corners clear of the wrist.
Can I use an old belt?
Check a scrap for stiffness, cracks and rough backing first. A belt that resists bending or cracks when curved makes a poor cuff blank. Soft leather offcuts are easier to size and finish for this project.
How do I clean the finished cuffs?
Follow the care directions for the specific leather, lining and tape. Test any cleaner on an offcut, let the cuffs air-dry completely, and inspect the thread and peel tabs before storing them. Replace a cuff if the leather cracks, the tape separates or the release becomes unreliable.